I had just gotten through running 4.5 miles on an early afternoon Sunday. I don’t typically work out during the weekends but felt inclined since I’d only worked out three times during the week. As I stood in the shower, I was thinking about what I’d have for lunch. The leftover french dip sandwich in the fridge came to mind but so did the thought of “Oh but I shouldn’t eat bread”. More ideas followed and each time there was an “Oh but I shouldn’t…” immediately afterward.
I rolled my eyes at myself.
It occurred to me that my focus needs to shift to the ‘shoulds’ instead of the ‘should nots’.
Perfect Example: I should eat more veggies instead of “I shouldn’t eat bread”.
Although I suspect this subtle shift may take time to incorporate as a habit, I highly suspect it will lead to a happier existence.
I’ve been making this dish for over 10 years. It’s relatively easy to make – meaning it’s not a complicated recipe – but it does take some prep work and not a recipe that can sit in a pot and cook itself. If you’re okay with being on your feet for about an hour in the kitchen, then read on.
Just a warning that this is going to produce quite a few dirty dishes. Most of the items that are needed for cooking are pictured below. I’ve also made note of the omissions.
Not pictured: Fork to stir the pico de gallo ingredients, another medium sized bowl for the tortilla shells. I used the white bowl for trash during the prep.
Here are the ingredients for dish:
For the chicken:
About 1 lb of chicken thighs (excluding the bones). I buy boneless.
1 packet of McCormick’s chicken taco seasoning
1/3 cup of chicken broth (for the taco seasoning)
1/2 medium white onion sliced thinly
cooking oil (I prefer olive oil)
several sprigs of cilantro (roughly chopped) – optional
For the Pico De Gallo:
1/2 medium white onion- diced
1 large red or yellow ripe tomato or a few romas – diced
1 large jalapeno or a couple of small ones (depending on what’s available)-diced
juice of 1 lime
cilantro (leaves only) – about 1/4 of a handful – roughly chopped into small pieces
sea salt to taste. I put a lot of salt in mine.
For the shells:
corn tortillas
good frying oil (I prefer olive oil) but canola oil is also good.
Steps:
Start by boiling the chicken thighs on medium heat for about 25 minutes – lower to a simmer if the water starts to boil. Remove the chicken thighs and allow to cool. Reserve at least 1/3 cup of the water to use when mixing the chicken with the chicken taco seasoning.
Meanwhile, make the pico de gallo by combining all ingredients into a medium sized bowl, mixing well, then adding sea salt to taste.
Once the chicken has cooled, either dice it or shred it (I prefer to shred it with my hands because this allows me to remove the unwanted fatty parts).
Heat a medium sized pan over medium heat and pour enough oil in the pan to just coat the bottom. Allow to heat for about a minute then add the sliced white onions. Mix the onions in the pan for a few minutes before adding the chicken. Mix the chicken with the onions then add the Chicken Taco Seasoning packet, followed immediately with the 1/3 cup of chicken broth. Lower the heat to low to medium then incorporate the taco seasoning mix by turning it into the chicken and onions repeatedly. Continuously turn the mixture gently for a few minutes, adding a bit of cilantro for garnish. Turn off the stove and set aside. Cover the chicken to keep it warm or better yet, keep it in the warming oven while you prep the corn tortillas.
Line a medium sized bowl with several sheets of paper towel. Heat a small pan over medium/high heat and pour about 1/4 inch of cooking oil into the pan. Allow the cooking oil to get very hot (it’s ready when the oil starts to look wavy). Carefully place a small corn tortilla into the hot oil, allowing to fry for about 20 seconds before turning over. Allow to cook for 20 seconds on the other side and, with a pair of tongs, carefully fold the tortilla in half to form a taco shell. Place the tips of the tongs between the tortilla flaps to hold open while one side of it cooks. After 20 seconds, turn the tortilla in the pan and cook the other side. Lift the shell out of the pan and allow as much oil to drip off of the shell before transferring to the paper towel lined bowl. My preference is to keep the cooked shells in the warming oven as I fry the others.
This recipe makes about 8 tacos.
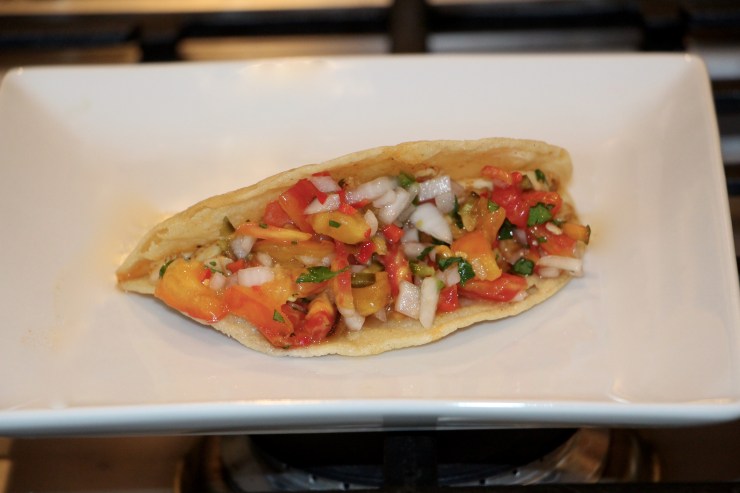
It’s best to serve immediately after the shells have been fried.
To serve, put about 2 ounces of chicken taco mixture into each shell and spoon a couple of tablespoons of the pico de gallo on top.
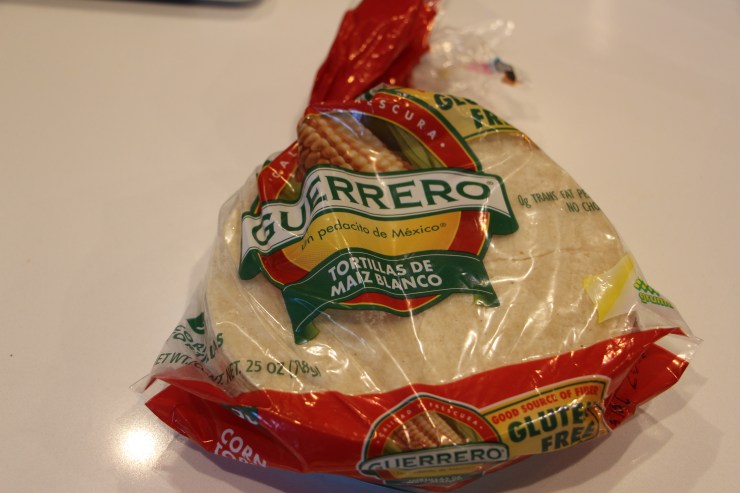
A note about corn tortillas: The brand pictured below, I believe, is the best out there as far as taste is concerned. The handmade corn tortillas I included in the ingredients picture is a local brand and good but not great. The brand pictured below is great. They’re thin enough that when they’re fried, they give a satisfying crunch while still being soft and chewy.
There are many types of camping, including glamping (my preference) but that’s not the type of camping I experienced recently. By those of us who prefer glamping, the type of camping I subjected myself to is known as ‘primitive’ camping. Definition of ‘primitive’ camping? No electricity. No wifi. No plumbing. No running water.
But “no worries” I said.
My fellow campers didn’t refer to it as ‘primitive’ camping. Instead, they called it ‘car’ camping. Reason being, camp is close to our parked vehicles and we used the car to hold all the gear that was needed for ‘primitive’ camping…err…car camping.
Note proximity of tent to car (hence the term ‘car camping’)
It was actually fun once I got over the no running water or modern day plumbing. Admittedly, that was the most anxiety causing aspect of this experience for me. It helped that there were a few other girls (experienced campers) who acted like it was no big deal at all to walk away from the campsite carrying a roll of toilet paper. So, when in Rome…
At night, we slept in our designated tents and in the mornings we’d get up, go to our vehicles and set up shop to make breakfast. We each came equipped with our own Coleman camping stove(mine was brand new), a foldable table to use as a ‘counter’ for the stove and meal prep, and all the various things that are needed to make a meal. Since this was my first time doing this, I was quite ill-prepared. I forgot basic things (like cooking utensils) but made do with what I had (plastic flatware).
After breakfast, we’d clean up, pack the makeshift kitchen back into the car, then head off to nearby walls for rock climbing (I am a novice rock climber and have been for the past 4 years now). In the early evening, we’d return to the camp site and reassemble the kitchen to make dinner. And afterward, everyone would gather around the fire pit, build a fire, and enjoy a beverage (or a few) of choice.
My favorite memory about the trip was making breakfast and drinking coffee in the mornings. My least favorite was the pick axe – I elaborate a bit below.
Overall, I absolutely loved it and I’m looking forward to doing it again. I’ll be better prepared for the next trip though. That’s because I’ve thought of a few ways to make it even more enjoyable.
Tips (for anyone thinking about car camping) and Observations (for me to keep in mind on my next trip):
Bring a small shovel to go along with the toilet paper. That should be self-explanatory. This is actually at the top of my list because my significant other brought along none other than a pick axe. I could carry it without a problem but it was about half as tall as I am and was not at all discreet.
Invest in a sleeping bag that fits my frame. My bag was too big for me (I had a loner from my 5’11” significant other [henceforth referred to as SO]. I found out that having a sleeping bag that is too big meant my own body heat wasn’t enough to keep me warm in the bag. Since it was cold out, I was cold all night and didn’t sleep well at all.
I’m bringing an insulated mug. I like a warm beverage in the morning (coffee). I had a camping mug made of thick plastic – it didn’t keep my coffee hot for very long.
Bring regular cooking pots or pans (in smaller sizes). Specifically for this camping trip, I invested in lightweight pots and pans that warped. Because we were car camping, there was really no point in the lightweight pots and pans that apparently are only used by people who actually have to hike ( a long way) to their campsite.
Bring more firewood. On both nights, I wish the campfire could have gone on for a longer period of time. We actually ended up foraging for wood for the last campfire – kind of difficult to find once it gets dark in the middle of nowhere. My companions were rock climbers though – they strapped their headlamps on and went looking.
Bring along a straw mat or rug for the entrance space immediately outside of the tent. This was something I actually did this time and plan on doing again. I appreciated being able to sit down on the mat to remove my shoes and socks (they were less than clean) prior to entering the tent.
Bring camp chairs. I had chairs for this trip. I loved having a comfortable chair in front of the campfire after a long day of hiking and climbing.
If camping in a wooded area, bring bug spray! I did bring some (bugs love me) but I didn’t put it on. Thankfully, we were not in a heavily wooded area and I did not get bit. It was nice to know I was prepared though.
Pack wet wipes. I brought Cetaphil facial cleansing wipes and ended up sharing them. I plan on doubling up my supply for the next camping trip.
Pack a regular kitchen towel (or three) for drying dishes. My SO packed some infomercial ‘super-absorbent’ ‘towels’ – they did not perform as advertised.
After seeing me post the same breakfast every day (two soft boiled eggs with a slice of toast) for nearly a month, my nutritionist asked that I make an effort to incorporate some variety, like oatmeal perhaps or fruits and veggies. She had to ask a dozen times more before I finally made an effort to comply.
This recipe is quick and easy and I make it the night before. After letting cool, store in the fridge over night and heat in the microwave (covered) for a minute right before eating. It’s also a great brunch recipe for guests, especially for those who prefer low carb dishes. If not, then serve with toast :).
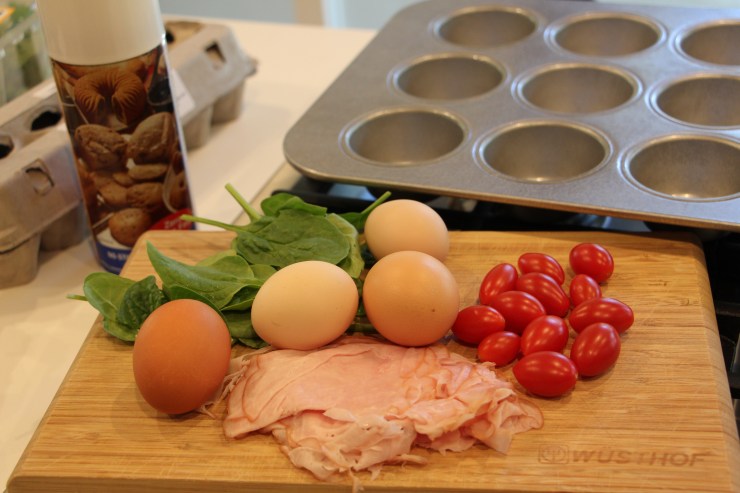
Ingredients (Makes 4 ham and egg muffins)
Your favorite ham from the deli (I used Boars Head smoked ham, sliced very thin)
Handful of baby spinach
12 cherry tomatoes (cut in half lengthwise)
4 small eggs
Heat the oven to 375 degrees fahrenheit, making sure that a rack is in the middle position.
Spray the desired number of cavities (4 in this instance) in a muffin tin with cooking spray or coat with a very thin layer of olive oil.
Line the muffin tins with a few thin slices of ham, making sure that the cavity is completely covered.
Layer a few sprigs of spinach over the ham.
Next, put in 6 cherry tomato halves.
Crack an egg in each muffin tin.
Bake for 13 – 15 minutes for eggs over medium (yolks are still runny in the middle but whites are cooked through).
It’s best to remove the muffins from the muffin tin with two small spoons.