Chicken Tacos
I’ve been making this dish for over 10 years. It’s relatively easy to make – meaning it’s not a complicated recipe – but it does take some prep work and not a recipe that can sit in a pot and cook itself. If you’re okay with being on your feet for about an hour in the kitchen, then read on.
Just a warning that this is going to produce quite a few dirty dishes. Most of the items that are needed for cooking are pictured below. I’ve also made note of the omissions.

Here are the ingredients for dish:

For the chicken:
- About 1 lb of chicken thighs (excluding the bones). I buy boneless.
- 1 packet of McCormick’s chicken taco seasoning
- 1/3 cup of chicken broth (for the taco seasoning)
- 1/2 medium white onion sliced thinly
- cooking oil (I prefer olive oil)
- several sprigs of cilantro (roughly chopped) – optional
For the Pico De Gallo:
- 1/2 medium white onion- diced
- 1 large red or yellow ripe tomato or a few romas – diced
- 1 large jalapeno or a couple of small ones (depending on what’s available)-diced
- juice of 1 lime
- cilantro (leaves only) – about 1/4 of a handful – roughly chopped into small pieces
- sea salt to taste. I put a lot of salt in mine.
For the shells:
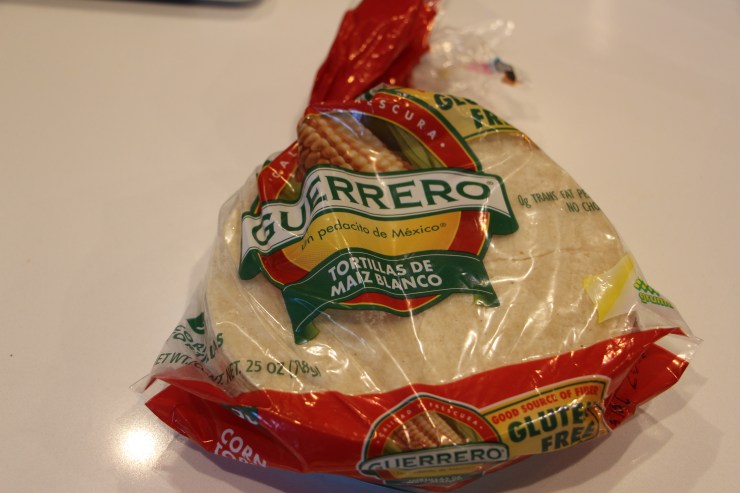
- corn tortillas
- good frying oil (I prefer olive oil) but canola oil is also good.
Steps:
- Start by boiling the chicken thighs on medium heat for about 25 minutes – lower to a simmer if the water starts to boil. Remove the chicken thighs and allow to cool. Reserve at least 1/3 cup of the water to use when mixing the chicken with the chicken taco seasoning.
- Meanwhile, make the pico de gallo by combining all ingredients into a medium sized bowl, mixing well, then adding sea salt to taste.

- Once the chicken has cooled, either dice it or shred it (I prefer to shred it with my hands because this allows me to remove the unwanted fatty parts).
- Heat a medium sized pan over medium heat and pour enough oil in the pan to just coat the bottom. Allow to heat for about a minute then add the sliced white onions. Mix the onions in the pan for a few minutes before adding the chicken. Mix the chicken with the onions then add the Chicken Taco Seasoning packet, followed immediately with the 1/3 cup of chicken broth. Lower the heat to low to medium then incorporate the taco seasoning mix by turning it into the chicken and onions repeatedly. Continuously turn the mixture gently for a few minutes, adding a bit of cilantro for garnish. Turn off the stove and set aside. Cover the chicken to keep it warm or better yet, keep it in the warming oven while you prep the corn tortillas.


- Line a medium sized bowl with several sheets of paper towel. Heat a small pan over medium/high heat and pour about 1/4 inch of cooking oil into the pan. Allow the cooking oil to get very hot (it’s ready when the oil starts to look wavy). Carefully place a small corn tortilla into the hot oil, allowing to fry for about 20 seconds before turning over. Allow to cook for 20 seconds on the other side and, with a pair of tongs, carefully fold the tortilla in half to form a taco shell. Place the tips of the tongs between the tortilla flaps to hold open while one side of it cooks. After 20 seconds, turn the tortilla in the pan and cook the other side. Lift the shell out of the pan and allow as much oil to drip off of the shell before transferring to the paper towel lined bowl. My preference is to keep the cooked shells in the warming oven as I fry the others.


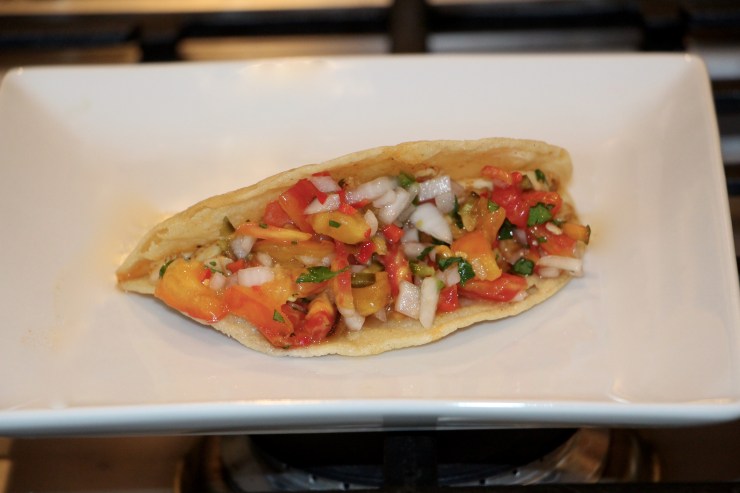
This recipe makes about 8 tacos.
It’s best to serve immediately after the shells have been fried.
To serve, put about 2 ounces of chicken taco mixture into each shell and spoon a couple of tablespoons of the pico de gallo on top.
A note about corn tortillas: The brand pictured below, I believe, is the best out there as far as taste is concerned. The handmade corn tortillas I included in the ingredients picture is a local brand and good but not great. The brand pictured below is great. They’re thin enough that when they’re fried, they give a satisfying crunch while still being soft and chewy.